1203 East College Street Brownsville, TN 38012


Protect Your Teeth from Cavities with Dental Sealants
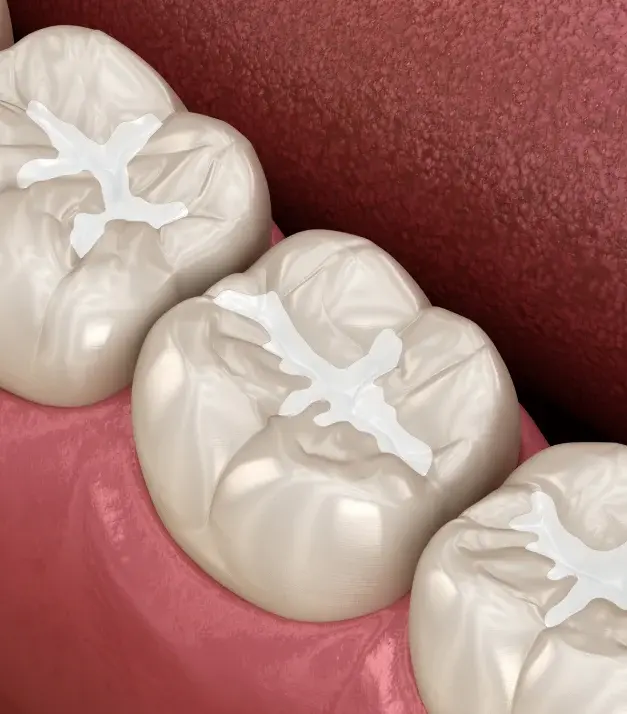
Brushing is essential, but a toothbrush bristle cannot always reach the tiny pits and grooves on the chewing surfaces of molars and premolars. Food particles and bacteria settle into those crevices, and cavities often follow. Dental sealants solve this problem by covering those vulnerable surfaces with a thin, smooth protective coating that keeps decay-causing bacteria and food out.
At Dove Family Dentistry in Brownsville, TN, we offer dental sealants as a preventive treatment for children, teens, and adults who want added protection against tooth decay. The application is fast, requires no drilling or numbing, and can help patients avoid fillings down the road. If you want to protect your child's new permanent molars or your own deep-grooved teeth, sealants are one of the simplest steps you can take.
How Dental Sealants Help Prevent Tooth Decay
Dental sealants work by smoothing over the deep grooves of back teeth, creating a barrier that helps prevent bacteria and food particles from settling into areas that are difficult to clean. They complement regular brushing, flossing, fluoride use, and professional dental examinations.
Benefits of dental sealants include:
- Sealants help shield the chewing surfaces of molars from the bacteria and food debris associated with tooth decay.
- Children's permanent molars can receive protection soon after they emerge, when their grooves may be especially vulnerable to cavities.
- Applying sealants generally does not require drilling, injections, or removal of healthy tooth structure.
- A sealed chewing surface can be easier to keep clean because deep grooves are covered.
- Dental sealants can remain effective for several years when properly maintained and checked during routine dental visits.
- Sealants protect the treated grooves, although they do not prevent decay from developing in every part of the tooth.
Who Can Benefit from Dental Sealants?
Dental sealants can benefit children, teenagers, and adults with deep molar grooves or an increased risk of tooth decay. They are especially useful when permanent molars first emerge, as these teeth can be difficult to clean thoroughly. Patients with a history of cavities or plaque buildup may also benefit from added protection. Dove Family Dentistry in Brownsville, TN, can evaluate your teeth to determine whether sealants are appropriate. Teeth with existing decay may require restorative treatment instead.
What Happens During Dental Sealant Application?
Dental sealant treatment is typically quick, comfortable, and straightforward. The process focuses on preparing the tooth surface so the sealant can bond properly and protect the grooves where decay commonly begins.
Examine the Teeth
The dental team examines the molars to assess their condition, identify deep grooves, and check for signs of decay. This evaluation helps determine which teeth may benefit from sealants and whether any existing concerns need attention first.
Clean the Chewing Surfaces
The selected teeth are cleaned to remove plaque and debris. Clean surfaces are important because the sealant needs to bond directly to the tooth rather than cover deposits that could interfere with placement.
Prepare the Enamel
A conditioning solution is applied to the chewing surface to help the sealant adhere securely. The tooth is then rinsed and dried according to the material's application instructions.
Apply the Dental Sealant
A thin layer of sealant is carefully placed into the pits and grooves of the tooth. The material flows into these small spaces to create a protective covering over the vulnerable areas.
Harden and Check the Sealant
Depending on the product used, a special curing light may be applied to harden the sealant. The dental team then checks the coverage and bite, making adjustments if needed to ensure the material is properly placed.
After treatment, most patients can return to their normal activities immediately. The team can also explain how to care for the treated teeth and when the sealants should be checked again.
How to Care for Sealed Teeth
Dental sealants can provide lasting cavity protection when combined with consistent oral hygiene and healthy daily habits. Brush twice a day with fluoride toothpaste and clean between your teeth daily to help remove plaque and food debris. Regular dental examinations are also important because sealants can wear down or become damaged over time. During these visits, the team at Dove Family Dentistry can check the condition of your sealants and recommend repairs if needed.
Try to avoid chewing ice, hard candy, or pens, as these habits may chip the protective coating. Limiting frequent sugary snacks and drinks can also help reduce cavity risk. If you notice a rough spot, chip, or change in a sealed tooth, let our team know so the sealant can be evaluated and reapplied if necessary.
Give Cavity-Prone Teeth Added Protection
Protecting molars early can help reduce the risk of cavities in the grooves where food and plaque often collect. Dove Family Dentistry provides preventive dental care in Brownsville, TN, with recommendations based on each patient's teeth, oral hygiene habits, and risk of tooth decay. Contact us at 123 456 789 or request an appointment to discuss dental sealants and other preventive treatments that may help keep your smile healthy.
Frequently Asked Questions About Dental Sealants
Dental sealants are thin, protective coatings applied to the chewing surfaces of back teeth. They fill in deep pits and grooves where food and bacteria collect, creating a smooth barrier that helps prevent cavities. Sealants are quick, painless, and clear or tooth-colored.